
This page contains a summary of developer information about running and creating tasks, as well as the overall M-USE architecture. For the full Developer Manual, visit our M-USE_Documentation Repository.
Running M-USE In Unity
Note: We use the Effort Control task as an example throughout this page.
Downloading the M-USE Repository
Download the M-USE repository from Github: M-USE_GitHub and import the project into Unity.
Configuration Files Setup
To obtain the Config and Resources folders, which are crucial for running M-USE, download the latest MUSE folder from Downloads, unzip it and place it on your desktop.
Next, you need to Setup Your Configuration Files.
Update the Build Settings
In Unity, update the build settings to include both (1) The TaskSelection Scene and (2) The Tasks’ included in your SessionConfig’s TaskMapping variable.

Start the TaskSelection Scene
In the project window, click “_USE_Tasks”, and then double click the “_TaskSelection” scene. The TaskSelection scene is the scene where you will select the individual task scenes you included in your config mapping and the build settings.
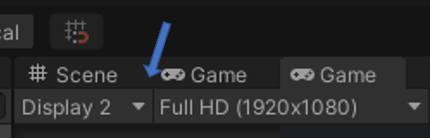
Now you’re ready to play! Hit the play button at the top of the editor. In a few seconds, the InitializationScreen will appear on Display 2. If you are on Display 1, click the dropdown shown in the figure below and select Display 2.
The following screen will appear. Press “Play”.

Next is the Initialization Screen where you will fill out important information for your session, including: SubjectID, the Subject’s Age, your config type and your data storage location.
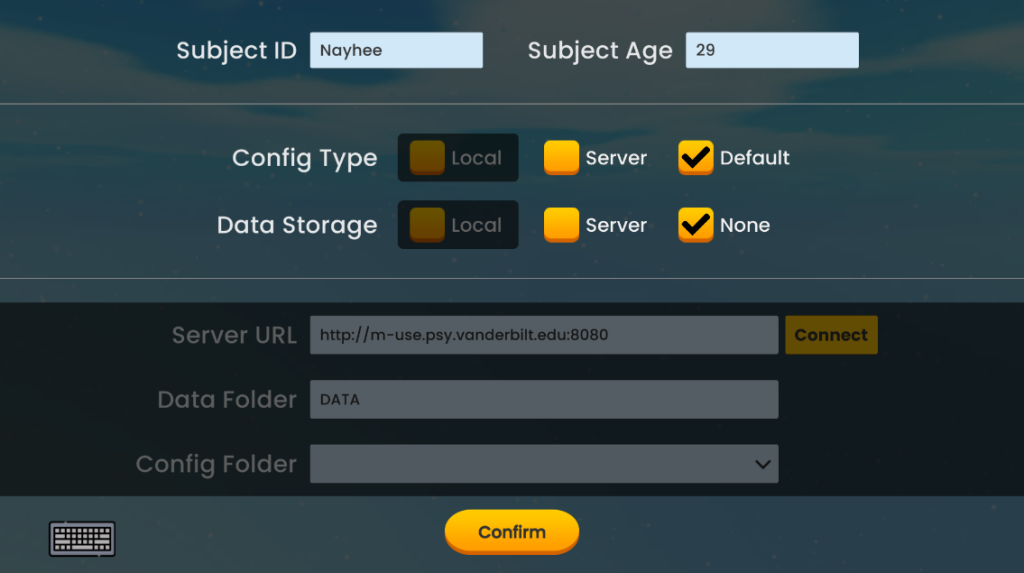
If you’re using local configs, click the Config Folder field’s “Browse” button and select the config folder you wish to use for the session. If you’re using local data storage, click the Data Folder field’s “Browse” button and select the folder you wish to write the data to during the session.
Once you’ve filled out all necessary information, click the Confirm button.
Now switch to the TaskSelection screen on Display 1 and select the task you wish to run by clicking its icon.
How to Create a Task
Step 1: Create the Task’s Scripts:
In the Unity editor, click the “USE” button in the top, horizontal navbar and select “Create Task Scripts”. Input the name of the Task and hit create. This will generate the default TrialLevel, TaskLevel, and Namespace scripts.
Step 2: Create the Task Scene:
In the Unity editor, click the “USE” button in the top, horizontal navbar and select “Create Task Scene”. Input the same name that you used above when creating the scripts. This will create the Scene in Unity. Next, follow the steps to setup your scripts gameobject, camera, and canvas, as detailed in the Generate Task Scene section of our M-USE Developer Manual (downloadable at our M-USE_Documentation Repository).
Step 3: Create the Task’s Configuration Folder and Files:
Follow the steps at the “Configuration Files Setup” section of the M-USE Developer Manual available at our M-USE_Documentation Repository.
Step 4: Define the Tasks’ Namespace (ex: EffortControl_Namespace.cs):
The Task’s Namespace is a container for your tasks’ main classes (Task, Block, Trial, Stim) and their fields, properties, and methods.
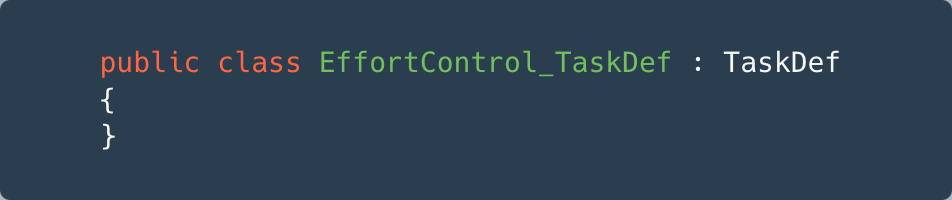
- First, define the EffortControl_TaskDef class:
- This class inherits from TaskDef, which has its own fields such as TaskName, ExternalStimFolderPath, etc.
- As shown below, Effort Control did not need any additional TaskDef variables.
- Second, define the EffortControl_BlockDef class:
- This class inherits from BlockDef, which has its own fields such as BlockCount, TrialDefs, etc.
- EffortControl uses a block structure, so the blocks and their values are specified in the EffortControl_BlockDef configuration file prior to running a session, and then the files are read in automatically at the start of the session.
- The class uses the GenerateTrialDefsFromBlockDef() method to create the block’s trials and pass them their values.

- Third, define the EffortControl_TrialDef class:
- This class inherits from TrialDef, which has its own fields such as BlockCount, TrialCountInBlock, etc.

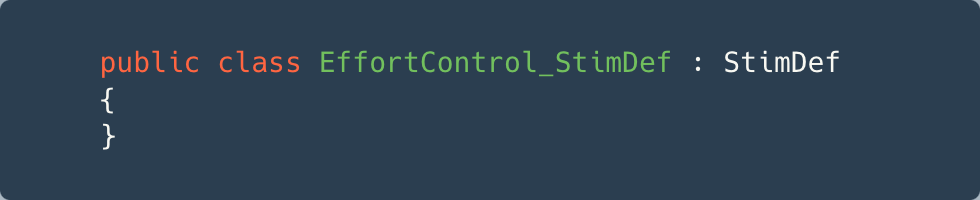
- Fourth, define the EffortControl_StimDef class:
- Effort Control does not use stimuli in the task, so there are no additional EffortControl_StimDef variables defined in the class.
- If your task planned to use Stimuli, you would define them there.
Relationship between Classes and Configuration Files
Each class can have a corresponding Configuration file, which you pre-populate, and its values are read in at the start of the session.
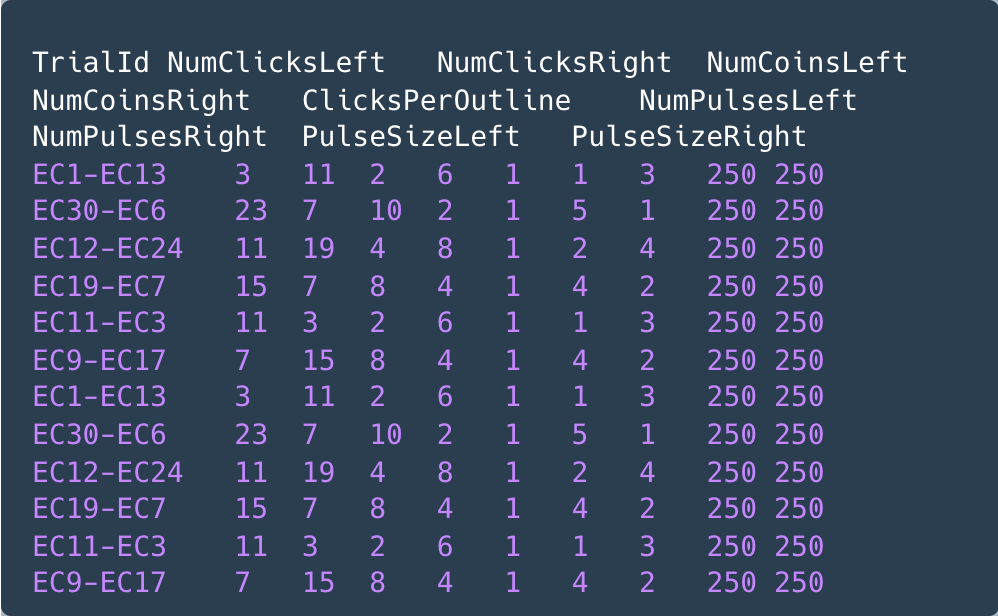
The figure below shows the EffortControl_BlockDef Configuration file, where you input the values for the block variables. Notice how the variables are the exact same between the BlockDef configuration file and the EffortControl_BlockDef class? This enables the configuration file values to be read in and mapped to their corresponding class variables.
Step 6: Define the Tasks’ TaskLevel (EffortControl_TaskLevel.cs):
- TaskLevel default states: SetupTask, RunBlock, BlockFeedback and FinishTrial.
- As shown in the figure below, the TaskLevel gets access to the current BlockDef through the GetCurrentBlockDef method and stores the block in the variable called “currentBlock”.
- This allows us to access/alter the current block’s data from the Task Level.

- There is also a variable called “trialLevel” that gets a reference to the currently active trial Level. This allows us to set TrialLevel variables from the TaskLevel.

- Next is the Task Level’s DefineControlLevel() method, which runs once the TaskLevel is initially defined. Within it, you can access and add to the default TaskLevel states (inherited from the ControlLevel_Task_Template).
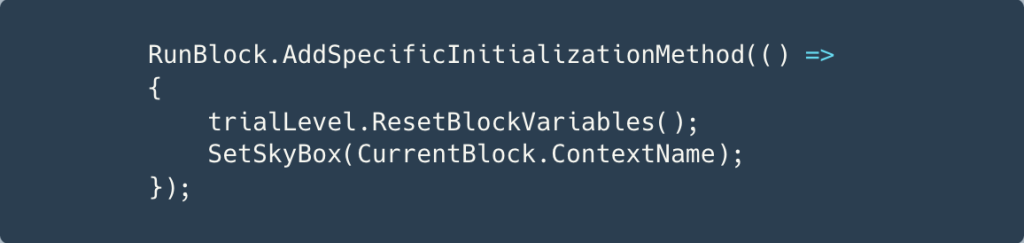
- Below, an initialization method is added to the “RunBlock” State to reset the TrialLevel’s block variables and create the Skybox (background) for the block. (RunBlock is one of the Default States of the TaskLevel).
Step 7: Define the tasks’ Trial Level (EffortControl_TrialLevel.cs):
- The TrialLevel script will be the densest of the scripts, as it contains the logic for the individual states of a trial.
- There are 2 default states, SetupTrial and FinishTrial. You create any other states necessary for your task.
- The TrialLevel class contains a very important and frequently used variable called “currentTrial” (shown below), that provides us a reference to the current trial.

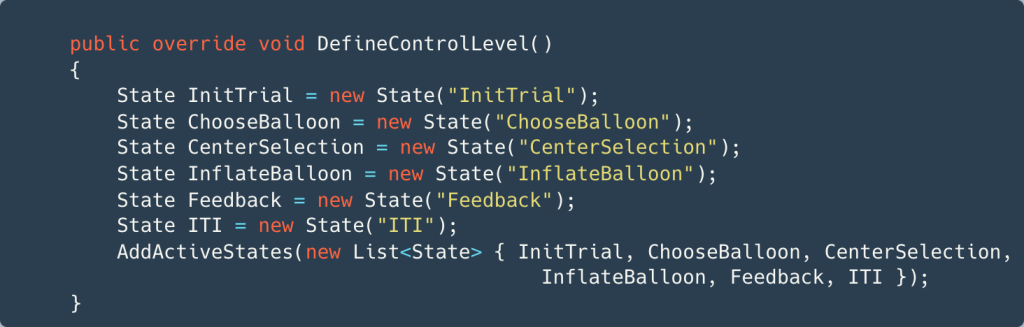
- After the rest of the trial level variables, you will see the DefineControlLevel() method, which defines the TrialLevel and will be where we create custom states.
- The figure below shows the creation of my custom states for Effort Control.
Now that we’ve created our states, it’s time to customize them to meet the needs of our task.
Main State Methods
See StateSpace for an overview of the state system.
There are 5 main state methods used on individual states:
AddInitializationMethod()
- This method is called at the first frame of the state and is useful for initializing values or running methods at the start of the state.
- Below, we add an initialization method to the SetupTrial state in order to load the ConfigUI variables.

AddUpdateMethod()
- This method runs every frame of the Unity update cycle and is ideal for behaviors that update each frame, such as input handling, moving objects, timers, or animations.
- Below, we add an Update method to the CenterSelection state in order to center the selected balloon to the middle of the screen at a smooth rate. Every frame, this method runs and checks if the current position is the centered position, and if not, it moves towards the centered position. When the balloon reaches the centered position, the termination criteria is triggered and the state ends.

SpecifyTermination()
- Option 1 for terminating a state.
- This method dictates the progression through the state system by assigning both a termination criterion and a successor state.
- In the example above, the termination criteria is met when the “Centered” Boolean is true.
- The second input to the method is the subsequent state (Delay).
- Note: there’s also a third, optional parameter that allows you to specify a method to run upon termination.
AddTimer()
- Option 2 for terminating a state.
- This method allows you to set a time limit for a given state.
- Below, we add a timer to the InflateBalloon state, specifying the duration (inflateDuration.value) and the subsequent state (PopBalloon).

AddUniversalTerminationMethod()
- This method will get run upon the termination of the current state, which is useful for running certain logic regardless of how the state was terminated (whether by timer or by meeting the termination criteria).
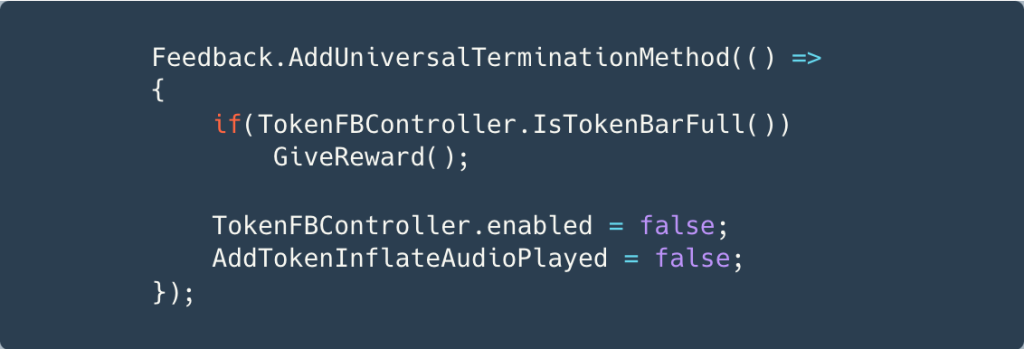
- Below, we add a universal termination method to the Feedback state in order to send the reward command, disable the TokenFbController, and reset the AddTokenInflateAudioPlayed boolean.
State Space
Overview
The hierarchical finite state machine that governs the operation of M-USE is composed of a number of control levels, each of which is always in one, and only one, state.
States
States consist of:
- Initialization methods that occur once, on the first frame they are active.
- Update(), FixedUpdate() and LateUpdate() methods that occur as part of Unity’s internal update loop.
- Termination criteria that specify the conditions that will stop the states.
- Termination methods that occur once, immediately after a termination criteria is true.
- A designation of the successor state that will become active after the current state’s termination, or a null designation if no state should follow, which will terminate the control level.
See MainStateMethods for descriptions and examples of the main state methods.
State Structure
The figure below depicts the framework’s State Structure:
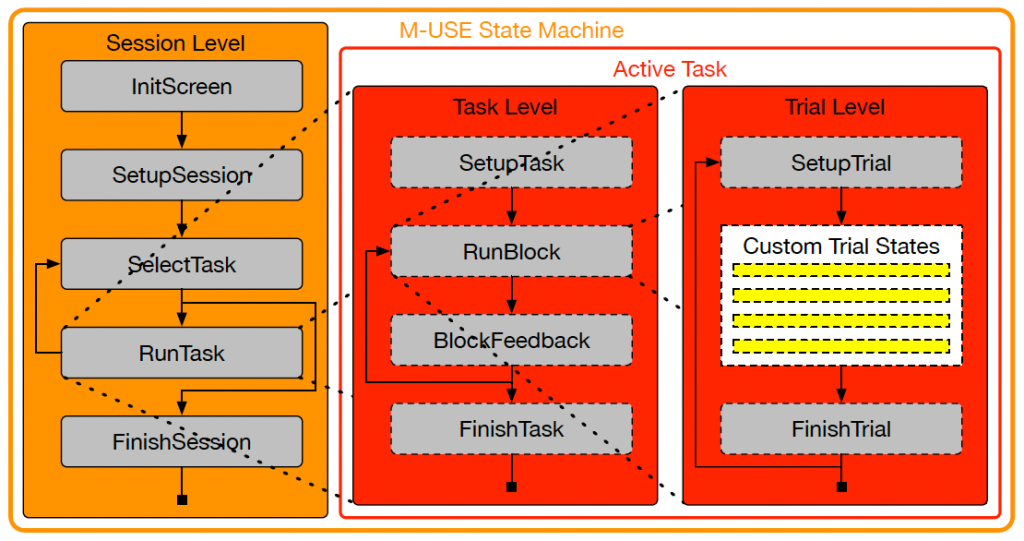
Control Levels
A control level consists of a number of state definitions, and the rules governing the transitions between them, as well as its own initialization and termination conditions, that will run on the first and last frame that the level is operational. Control levels also have their own initialization and termination methods, that are run on the first and last frames, respectively, in which the level is operational.
The hierarchical aspect of the state machine comes from the fact that a given state can have a child control level, which will operate so long as the state is active. For example, the Session Level’s RunTask state has a child Task level, which itself has RunBlock state with a child Trial level.
Control levels do not have to always run through the same sequence of states in the same order. A given state can have many termination criteria, each of which leads to a different successor state. This allows for a great deal of flexibility in their activity, including the activation of transient states that only become active in particular circumstances.